Fastlane
Client-side Integration
Step 1: Initialize the SDK and Braintree data collector
Instantiate the Braintree client and Braintree data collector.
Pass the contents of the data collector's deviceData property to braintree.fastlane.create as shown here.
- HTML
<script src="https://js.braintreegateway.com/web/3.116.0/js/client.min.js"></script>
  <script src="https://js.braintreegateway.com/web/3.116.0/js/fastlane.js"></script>
<script src="https://js.braintreegateway.com/web/3.116.0/js/data-collector.min.js"></script>Check for Existing Braintree Integration:
Do you already have a Braintree integration?
If yes, you might already be initializing:
Braintree client
Braintree data collector
Required Action:
Upgrade your Braintree client and Braintree data collector for existing integration.
Initialize client and data collector only once. So, even if you have a previous integration and added Fastlane, you should leverage or load the client and data collector scripts you initialize for Fastlane for your other integrations as well, and not have multiple scripts.
Initialize Fastlane component
const clientInstance = await braintree.client.create({
  authorization: "<YOUR CLIENT TOKEN>"
});

   const dataCollectorInstance = await braintree.dataCollector.create({
    client: clientInstance,
    riskCorrelationId: "<SESSION ID>"
});

   const styles = {
    //specify global styles here
    root: {
      backgroundColorPrimary: "#ffffff"
    }
 }

   const deviceData = dataCollectorInstance.deviceData;

   // For all configuration options for the fastlane construct
   // please refer to the Reference types section
   const fastlane = await braintree.fastlane.create({
   authorization: "<YOUR CLIENT TOKEN>",
   client: clientInstance,
   deviceData: deviceData,
   styles: styles
 });

   const identity = fastlane.identity;
   const profile = fastlane.profile;
If you have an existing Braintree integration, we recommend to not pass riskCorrelationId to dataCollector unless you have a specific reason to do so.
Step 2: Look up and authenticate payer
The first step of the checkout flow is to collect the email address.
Email Sharing with PayPal:
- Since the email address will be shared with PayPal, it is crucial to inform the payer. The Fastlane watermark should be displayed below the email field. Refer to the details in the advanced section for options to display the Fastlane Watermark.

PayPal is a data controller and Business under the California Consumer Privacy Act. You'll be sharing consumers' email addresses with PayPal, and we recommend you make PayPal known to your consumers by leveraging our SDK to render the Powered by Fastlane logo and information tooltip. If you have any questions about this feature or your compliance with data protection laws, please consult your legal advisors.
After collecting the email address, call identity.lookupCustomerByEmail(email) to determine whether the email is associated with a Fastlane member (or belongs to a PayPal member).
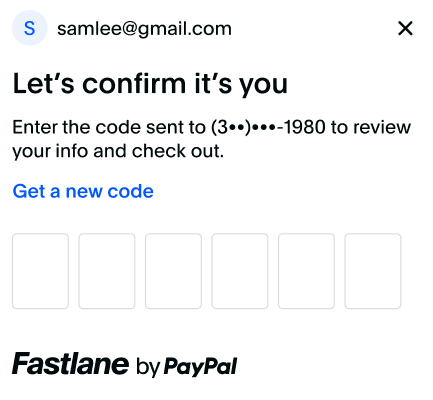
Fastlane members need to authenticate themselves before you can get their profile information. They will be presented with a screen to authenticate themselves by entering an OTP that will be sent to their registered mobile number.

const {
    customerContextId
   } = await identity.lookupCustomerByEmail(document.getElementById("email").value);

   var renderFastlaneMemberExperience = false;

   if (customerContextId) {
   // Email is associated with a Fastlane member or a PayPal member,
   // send customerContextId to trigger the authentication flow.
   const {
    authenticationState,
    profileData
   } = await identity.triggerAuthenticationFlow(customerContextId);

   if (authenticationState === "succeeded") {
    // Fastlane member successfully authenticated themselves
    // profileData contains their profile details
    renderFastlaneMemberExperience = true;
    const name = profileData.name;
    const shippingAddress = profileData.shippingAddress;
    const card = profileData.card;
   } else {
    // Member failed or cancelled to authenticate. Treat them as a guest payer
    renderFastlaneMemberExperience = false;
    }
   } else {
   // No profile found with this email address. This is a guest payer
   renderFastlaneMemberExperience = false;
   }
triggerAuthenticationFlow() method returns an AuthenticatedCustomerResult object. Use the authenticationState property in the AuthenticatedCustomerResult object to check if the payer has successfully authenticated.
The Fastlane members card details and default shipping address are returned with the profileData object contents on successful authentication and the renderFastlaneMemberExperience is set to True.
Handling Failed/Declined Authentication:
- Render the same experience as you would for a guest payer if a Fastlane member fails or declines to authenticate.
Step 3: Render the shipping address
The integration for shipping addresses is based on each persona.
| Use-case | Integration required |
|---|---|
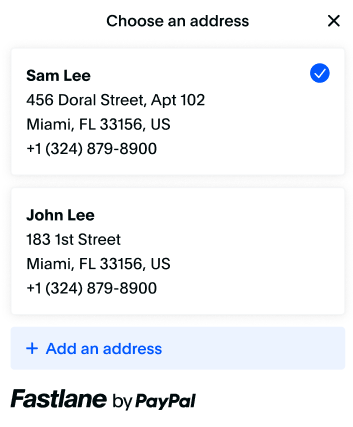
| Fastlane members with a shipping address |
|
| Fastlane members without a card or no card brands you support | No changes required. Continue to render your own shipping address collection form and pass it into the server-side transaction request. |
| Guest payers | No changes required. Continue to render your own shipping address collection form and pass it into the server-side transaction request. |


Shipping Address Considerations
- Fastlane is only available for USA based customers. While we don’t have any restrictions on shipping addresses, the merchant can decide who they want to ship to. The merchant can disallow either countries or regions/states/provinces and we'll honor that in our shipping address component and forms.
- If the user adds a new address to their Fastlane profile, send new address in the server-side request
- For more details refer to the shipping address guidelines in the advanced section
Code Snippet to render shipping address for Fastlane members/ guest user.
if (renderFastlaneMemberExperience) {
    if (profileData.shippingAddress) {
    // render shipping address from the profile

    const changeAddressButton = document.getElementById("your-change-address-button");

    changeAddressButton.addEventListener("click", async () => {
      const {
        selectedAddress,
        selectionChanged
      } = await profile.showShippingAddressSelector();

      if (selectionChanged) {
        // selectedAddress contains the new address
      } else {
        // selection modal was dismissed without selection
      }
    });
    } else {
    // render your shipping address form
    }
    } else {
    // render your shipping address form
    }
Step 4: Integrate payment
Fastlane offers the following quick-start payment integration pattern to accept payments.
Payment Integration helps you to use PayPal's pre-built UI for payment collection and integrate quickly and easily. The ready-made payment UI component will automatically render the following:
Selected card for the Fastlane member.
'Change card' link allows payers to change the selection or add a new card.
Card fields for Guest users or for Fastlane members who don't have a card in their profile
Billing address fields
Key Features
The quickest way to integrate Fastlane
Pre-formatted payment form
Collect information included on the payment form for Guest Users:
Credit card number
Cardholder name
Expiration date
CVV
Billing Address included on payment form for Guest users :
Street Address
City
State
Zip code
Data Security: Quick Start Integration is PCI DSS compliant, ensuring that customer payment information is handled securely.
Integration
Add the Fastlane button
<!-- Div container for the Payment Component -->
  <div id="payment-container"></div>
  <!-- Submit Button -->
  <button id="submit-button">Submit Order</button>
Collect Shipping Address and prefill phone number field using the sample code shared below :
const shippingAddress = {
   firstName: "Jen",
    lastName: "Smith",
    company: "Braintree",
    streetAddress: "1 E 1st St",
    extendedAddress: "5th Floor",
    locality: "Bartlett",
    region: "IL", //must be sent in 2-letter format
    postalCode: "60103",
    countryCodeAlpha2: "US",
    phoneNumber: "14155551212"
    }

    const options = {
    fields: {
    phoneNumber: {
      // Example of how to prefill the phone number field in the FastlanePaymentComponent
      prefill: "4026607986"
    }
    },
    styles: {
    root: {   //specify styles here
      backgroundColorPrimary: "#ffffff"
    }
      }
    };

    const fastlanePaymentComponent = await fastlane.FastlanePaymentComponent({
    options,
    shippingAddress
      });
      await fastlanePaymentComponent.render("#payment-container");

      // event listener when the user clicks to place the order
    const submitButton = document.getElementById("submit-button");
    submitButton.addEventListener("click", async ()=> {
    const { id } = await fastlanePaymentComponent.getPaymentToken();

      // Send the paymentToken and previously captured device data to server
      // to complete checkout
    });
After you have received the paymentToken , it should be sent to your server to create a transaction with it.
Refer to the Reference section for more information on what options can be passed to each of the functions shown in the code sample above.
Next step: Server-side Integration